Links concerning this chapter:
 Versions SN85G4 and SN85G4V2
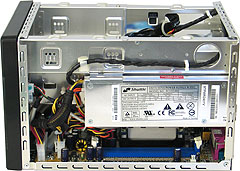
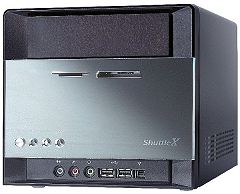
 | The model versions SN85G4 and SN85G4V2
have different power supplies, but their technical
specification is identical. With SN85G4G2 you can see the PSU label
from outside (as in the pic). With SN85G4, the
PSU label is sticked from inside. |
 BIOS-Update
Performing a Bios-Update, as shown in the example below, it is better to add a few parameters to reset CMOS-memory, DMI-Pool Data etc. afterwards:
awdflash an50s00q.bin /cc/cd/cp/py/sn/r
 Important note about AGP-Slot
Depending on chipset, the AGP-Slot supports AGP 4X-Cards in particular, because only 1,5V signals are supported instead of 3,3V. The encoding of the AGP-connector avoids miscompatibility in most cases: without the 1,5V-notch they cannot be inserted mechanically. Thus, this AGP-Slot is no more downward compatible to graphics cards as e.g. Voodoo, Matrox G200, ATI Rage Fury, many NVidia cards with TNT-chip and S3's Savage4. Many AGP-graphics cards with SiS305-chip and some cards with TNT2-chip can be plugged on the AGP-Slot, though 3,3V are supported, but this can end up in destruction of the affected hardware components!
 Clear CMOS without Jumper available now!
1) Pull the 230V plug from the power supply unit for a short time.
2) Push the button "Insert" during swith on the system.
 Hardware monitoring
 Problems with booting Linux?
Problems with booting Linux?
Booting with Red Hat 9, it was striking that the SerialATA-RAID controller is detected before the onboard-Nvidia controller, that even cannot be avoided by switching off the SerialATA-RAID Controller. Booting from IDE in this case is only possible, when entering in the command line while booting:
- linux ide0=0x1f0 ide1=0x170 hde=noprobe hdg=noprobe
In Version SuSE 9.0 of Linux supporting 64-bit-mode, this problem does not occur.
 Hitachi S-ATA HDD hangs?
How come when installing WinXP on a Hitachi HDS722580VLSA80 SATA HDD, the system hangs when formating?
You will need to install a beta Silicon Image chipset driver to solve this issue.
 Auto/Manual RAID mode
What’s the different between Automatic, Manual Online and Manual Offline settings for RAID1 in RAID Configuration Utility?
This is an application note for customers who want to configure a Raid 1 mirror using any Silicon Image storage product on a system with an existing OS and file system installed on their machine.
The "auto configuration" utility provided in our software is intended for users who are going to format the drive or do a fresh installation. When using this auto-configuration, the BIOS will only mark both drives as Raid 1 and identical without copying the data.
The “Manual Online” utility provide in RAID Configuration Utility is intended to scan and copy the difference of data in the background of operating system.
The “Manual Offline” utility provide in RAID Configuration Utility is intend to rebuild RAIDSet manually.
More information can be found at http://www.siliconimage.com/home.asp
 What is an example full system XPC SN85G4?
An example XPC SN85G42 full system is listed below. This full system has been tested according to Shuttle’s “Full Loading” test standard. With the following components installed, the XPC SN85G4 continuously runs benchmarking software for over three days.
- Model: SN85G4BIOS: fn85s015
- CPU: AMD 64 3400+ CG
- Memory: A-DATA DDR400 (PC 3200) 512MB * 2
- HDD: WD Raptor WD360 SATA 10,000rpm
- DVD-ROM: SONY DRU-510A DVD+RW
- USB device: SN85G4 USB2.0 card reader
- AGP card: ATI Radeon 9800 XT (Build by ATI)
- PCI card: WinFast TV2000 TV Tuner card
- Operating System: Windows XP Pro. + Service Pack 1
 Why won’t my operating system install onto the C: Drive?
This could be due to the internal card reader using the “C” drive title (and D, E F). Since the card reader is pre-installed, it has automatically been allocated the first 4 letters (starting from C). Try these solutions to install your operating system onto the C drive and avoid such issues:
- 1. Remove the card reader cable before install operating system.
- 2. Partition the hard drive before install operating system.
- 3. Plug-in the card reader cable.Q4


