Windows 2000 and XP installation on a Serial ATA (SATA) Hard Drive.
 To install an Windows 2000 or XP on a SATA hard drive, a floppy drive (or USB floppy drive) and floppy disk with the correct RAID drivers are essential.
The RAID floppy disk comes bundled in the accessory package. If the RAID floppy disk is missing, the steps below will help to create another substitute disk. (Those procedures will need to be done on other system):
- Insert the motherboard driver CD into your CD-ROM. Copy all files in RAID directory (D:\nVIDIA\K8\nForce3_250\WinXP_2K\IDE\WinXp) to a blank floppy disk. (Current CD driver is in Drive D)
- Or download the files here and extract them to a blank floppy disk.
Note: This procedure requires that you install TWO RAID DRIVERS. Repeat, you must install both drivers during the RAID installation procedure.
Pre-installation setup.
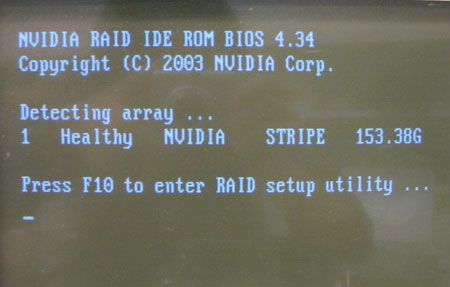
In BIOS you will need to enable RAID functionality and select the drives that you wish to use in a RAID array. (Refer to page 20 of the bundled RAID Manual.)
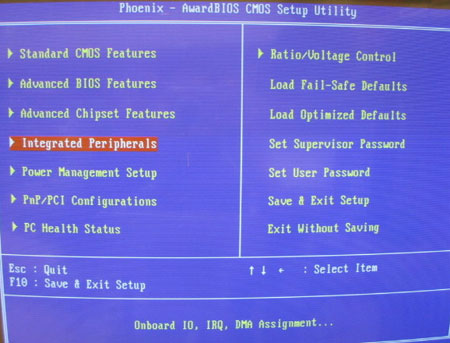
- Enter "Integrated Peripherals"
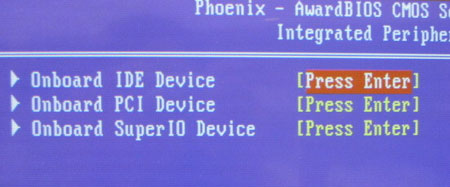
- Enter "Onboard IDE Device"
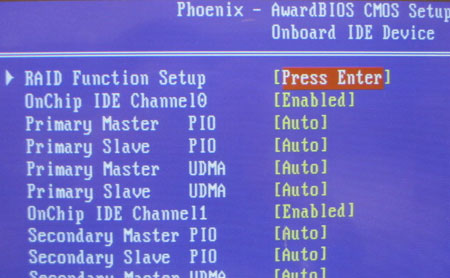
- Enter "Raid Function Setup"
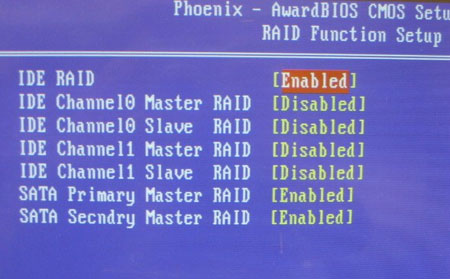
- Enable "IDE RAID" and enable any of the disks that you want to use as RAID disks.
- Press F10 to save the configuration and exit.
The following procedure outlines the important steps in installing Windows on a Serial ATA drive. Before you begin, please make sure the RAID driver disk is inserted in the floppy drive, and the floppy drive is connected to the computer.
Installing Windows
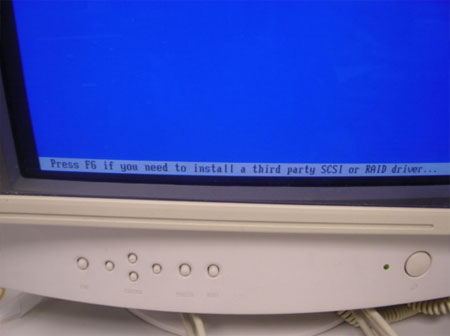
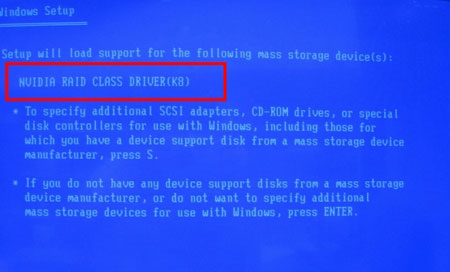
- Press F6 function key when RAID setup message string come up.
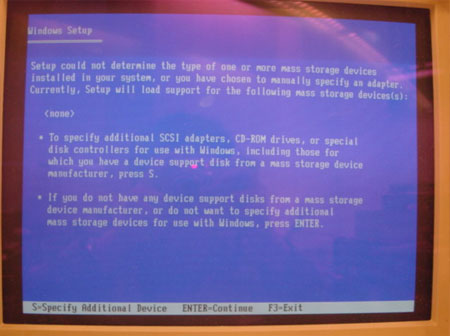
- Press S key to select RAID driver. (Please refer to the Nvidia RAID manual P27.)
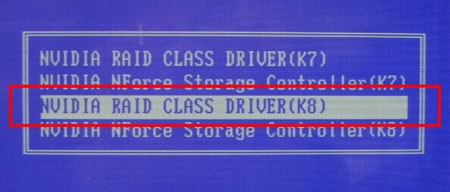
Note: You must install TWO RAID DRIVERS. Please follow the procedure below carefully to ensure successful RAID installation.
- Press "Enter" to select the " NVIDIA RAID CLASS DRIVER(K8)".
*Different RAID Driver version, the list will be different.
- The following Windows Setup screen appears listing the drivers that you choose.
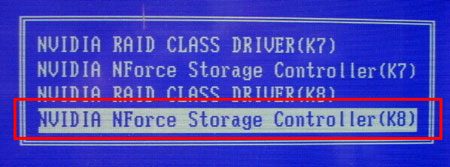
Press "s" to continue.
- Press "Enter" to select the "NVIDIA NForce Storage Controller(K8)".
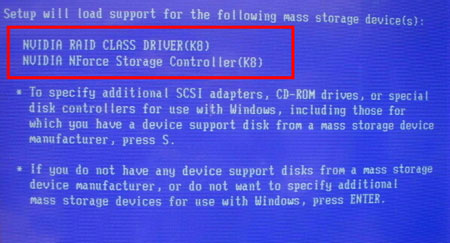
- The following Windows Setup screen appears listing both drivers.
After the drivers are selected, press Enter to continue installing Windows.
 |