 |

|
|
|
|
Repairing an existing system |
|
WARNING
When you repair Windows XP, existing data and programs may be erased. Make sure to back up all of your personal files on a CD-R before commencing reinstallation. After you have repaired the system software, you will need to reinstall all programs that are not included with Windows XP. After repair, all pre-installed programs of the original installation may require reinstallation.
- Switch on the monitor.
- Power up the Shuttle XPC.
- Press the "Del" (delete) key immediately for access to the BIOS.
- Select the menu option "Advanced BIOS Features".
- Click "ENTER".
- Using the PageUp and PageDown keys, set the "First Boot Device" to
"CDROM".
- Insert the Installation CD.
- Press "F10" to save your settings and again confirm your selection
with "Y" (yes) and "ENTER".
- When the message "Press any key to boot from CD" appears at the
bottom of the screen, press any key.
- The Shuttle XPC will now restart from the CD. The installer is now
loading the files. This may take a few minutes.
- A "Welcome" screen is displayed.
- Press "ENTER".
- Accept the EULA (End User License Agreement) by pressing "F8".
- Next, the Shuttle XPC searches for existing Windows XP installations.
- If an existing installation is found, you may choose to repair it. To do
this, press "R".
- The required data is now being copied from the CD.
- Once copying is complete, the Shuttle XPC restarts.
- If the message "Please press any key to restart from CD" appears
again, do NOT press any keys.
- The Shuttle XPC will now start from the hard drive.
- You may now select your language and region, and confirm with "Next".
- The Shuttle XPC restarts.
- The Windows XP "Welcome" screen appears.
- Continue with "Next".
- The Shuttle XPC is then reconfigured.
- You can now work with Windows XP.
|
|
|
|
|
|
 |
|
|
|
|
|
|
|
| Cercare |
|
|
|
|
|
|
| Shuttle Newsletter |
|
|
|
|
|
Hotspot product information |
|
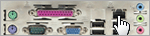
Move your mouse to the three product images to learn more about connectivity on the front and back panel.
 | |
|
|
 |
| La newsletter di Shuttle, inviata su richiesta, presenta le novità dal mondo Shuttle. | |
|
|
|
|