I have difficulty installing Windows with RAID.
 To install an Windows 2000 or XP on a SATA hard drive, a floppy drive (or USB floppy drive) and floppy disk with the correct RAID drivers are essential.
- Insert the motherboard driver CD into your CD-ROM. Copy all files in RAID directory (\nVIDIA\K8\nForce4\Win2kXP\IDE) to a blank floppy disk. (Current CD driver is in Drive D)
- Or download the files here and extract them to a blank floppy disk.
Note: This procedure requires that you install TWO RAID DRIVERS. Repeat, you must install both drivers during the RAID installation procedure.
Pre-installation setup.
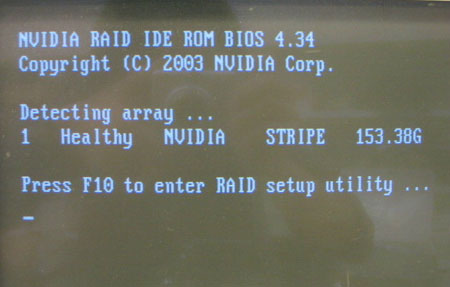
In BIOS you will need to enable RAID functionality and select the drives that you wish to use in a RAID array.
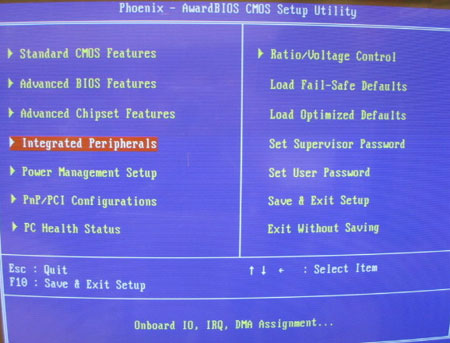
- Enter "Integrated Peripherals"
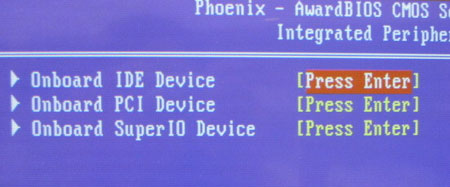
- Enter "Onboard IDE Device"
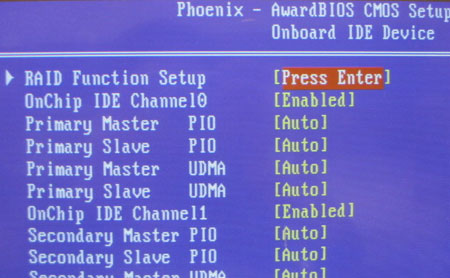
- Enter "Raid Function Setup"
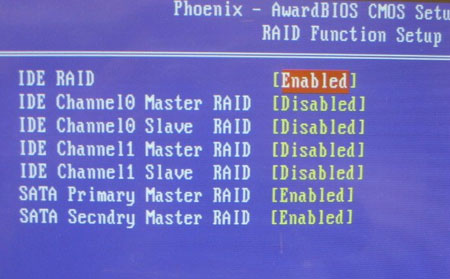
- Enable "IDE RAID" and enable any of the disks that you want to use as RAID disks.
- Press F10 to save the configuration and exit.
The following procedure outlines the important steps in installing Windows on a Serial ATA drive. Before you begin, please make sure the RAID driver disk is inserted in the floppy drive, and the floppy drive is connected to the computer.
Installing Windows
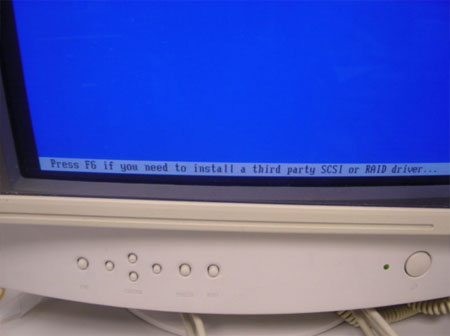
- Press F6 function key when RAID setup message string come up.
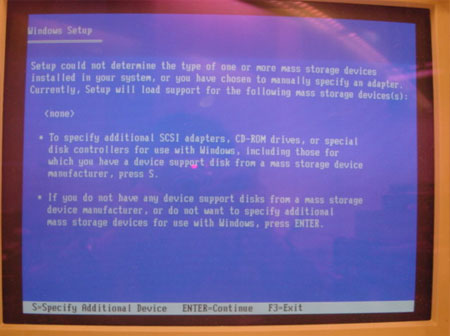
- Press S key to select RAID driver.
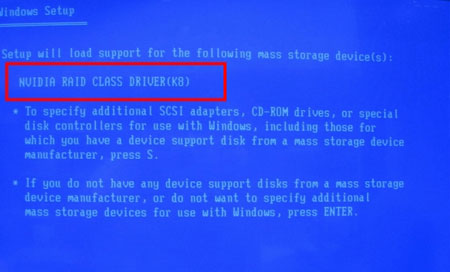
Note: You must install TWO RAID DRIVERS. Please follow the procedure below carefully to ensure successful RAID installation.
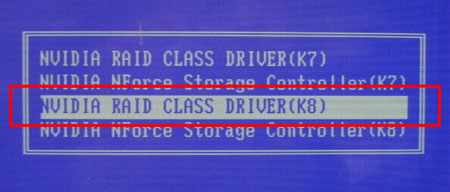
- Press "Enter" to select the " NVIDIA RAID CLASS DRIVER(K8)".
*Different RAID Driver version, the list will be different.
- The following Windows Setup screen appears listing the drivers that you choose.
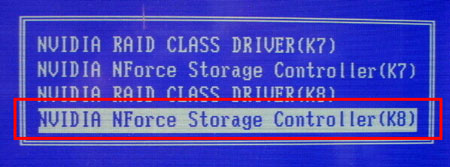
Press "s" to continue.
- Press "Enter" to select the "NVIDIA NForce Storage Controller(K8)".
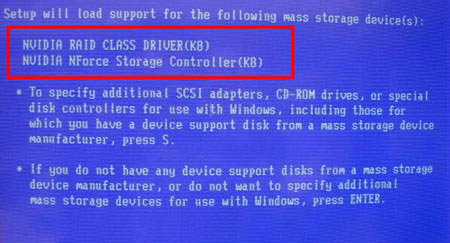
- The following Windows Setup screen appears listing both drivers.
After the drivers are selected, press Enter to continue installing Windows.
Note: Due to a driver limitation, If you're installing Windows XP, try void using Windows XP SP2 bundle CD. If you're installing Windows 2000, please use Windows 2000 SP4 bundled CD. |