1. Open WinFlash.

Fig. 2: Location of the WinFlash utility
The beginning screen of the WinFlash (2 different screen are available.)
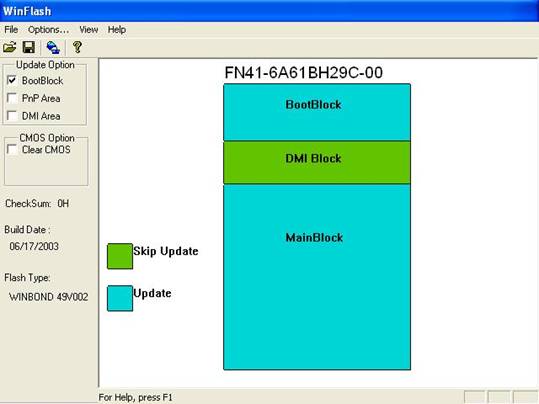
Fig. 3: First screen of the WinFlash(1)
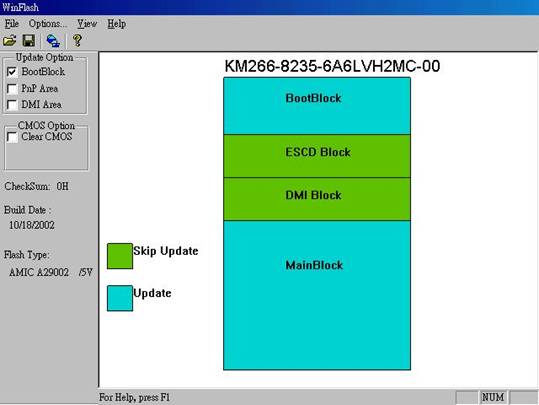
Fig. 4: First screen of the WinFlash(2)
2. Select Update Option: “DMI Area” and “Clear CMOS”
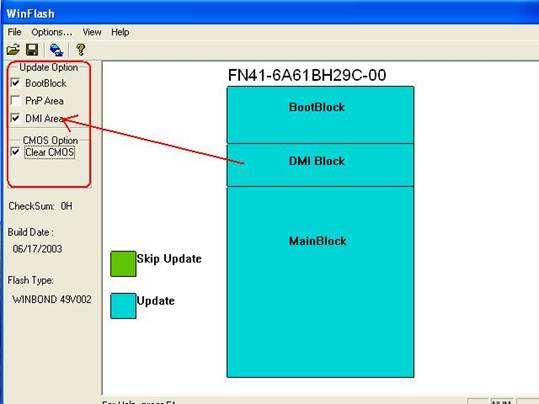
Fig. 5: All selected options will change from green to blue
The “PnP Area” option will be available if there is “ESCD block”
This is not required for updating the BIOS. Ps. ESCD: Extended System Configuration Data
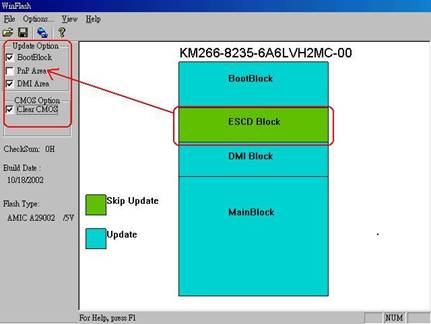
Fig. 6: ESCD available for some models. Again, this is not required.
3.Update/Flash BIOS
3.1 Select file: File & Open. Or Click Open icon 
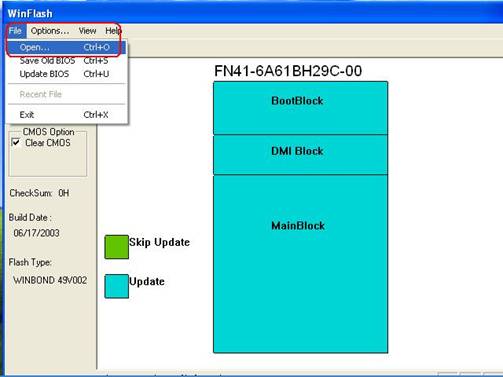
Fig. 7: 1st step in flashing/updating BIOS
Load the BIOS file you stored, select the BIOS name and then click Open.
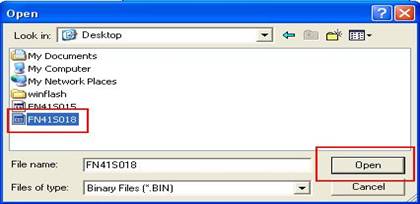
Fig. 8: Location of BIOS file
3.2 Execute the file: Select File & Update BIOS or click on the ”Update BIOS now” icon  to execute the update.
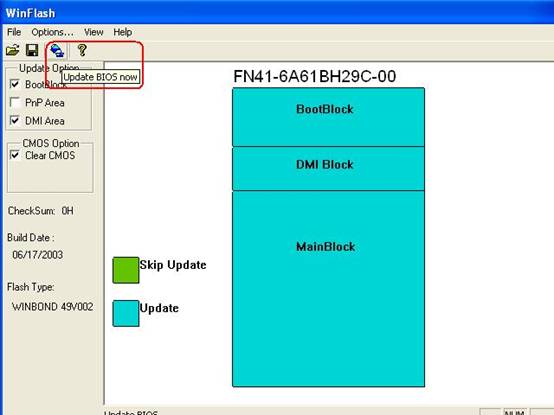
Fig. 9: Location of BIOS update icon
4.Select ”Update” button to start updating BIOS?
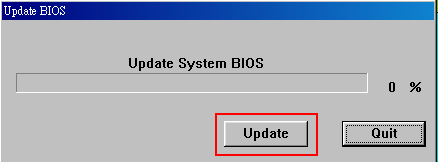
Fig. 10: Final message in updating BIOS
5. After BIOS has been updated, a REBOOT Message will show. Click “Yes” to continue.
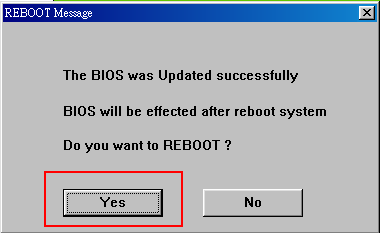
Fig. 11: Reboot Message
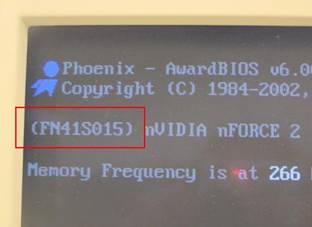
Rebooting initializes new changes. Take note of the new BIOS number on the first page of the POST screen.
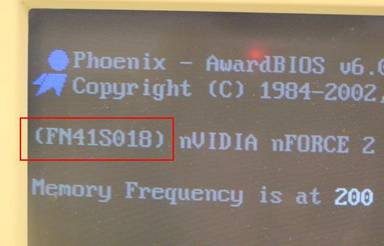
Fig. 12: Location of new the BIOS name.
Finally, when the update is complete, restart and enter CMOS Setup Utility (hold down delete at start up). Select “Load Optimized Defaults”, then “Save & Exit Setup”.
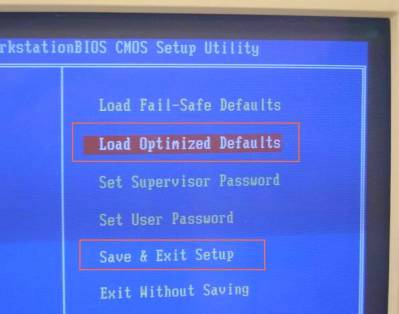
Fig. 13: BIOS setting.